
INSTALLING THE ARDUINO IDE
The Arduino IDE is available for free from the website www.arduino.cc:

Download the Windows installer package if you have a Windows system. This will install the IDE on your computer in the same way that any other program would. This, however, will only work if you have the ability to install apps on your computer.
If you do not have administrative privileges on your computer, download the Windows ZIP file for non-admin install file. This will keep the program files in a folder but will not install them. The IDE can be launched by double-clicking the arduino.exe file located within the folder.
There is also a Windows Store app that operates similarly to the other versions. For Mac users, download and install the Mac OS X file. Linux users can obtain the file in 32-bit, 64-bit, or ARM formats.
HOW TO SET UP THE ARDUINO IDE
After installing the IDE, the first thing you need do is configure the board type to the model of Arduino you'll be using. Depending on the microcontroller, sketches must be compiled differently. Setting the board type tells the IDE which microcontroller your Arduino has so that the code may be compiled correctly.
To configure your board type, navigate to Tools > Board and select the Arduino model you own. If you have an Arduino UNO, for example, select Arduino/Genuino UNO:


That's everything that it has in terms of configuration.
SKETCHES EXAMPLES
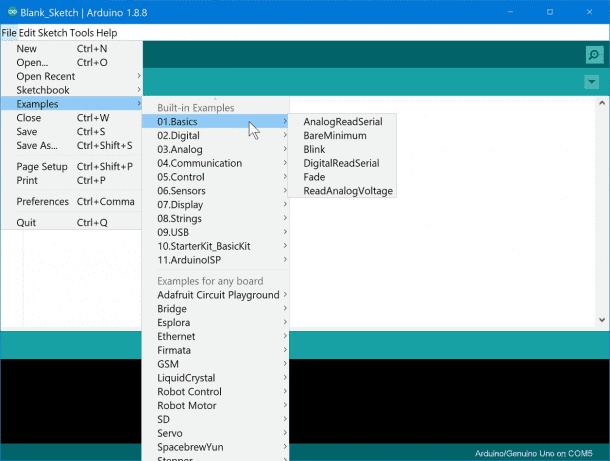
The Arduino IDE has a variety of useful example sketches. These are pre-written programs that can be used to control servos, blink LEDs, and write to LCD displays. To access the sample sketches, navigate to File > Examples:
WRITING ARDUINO PROGRAMS: A Guide
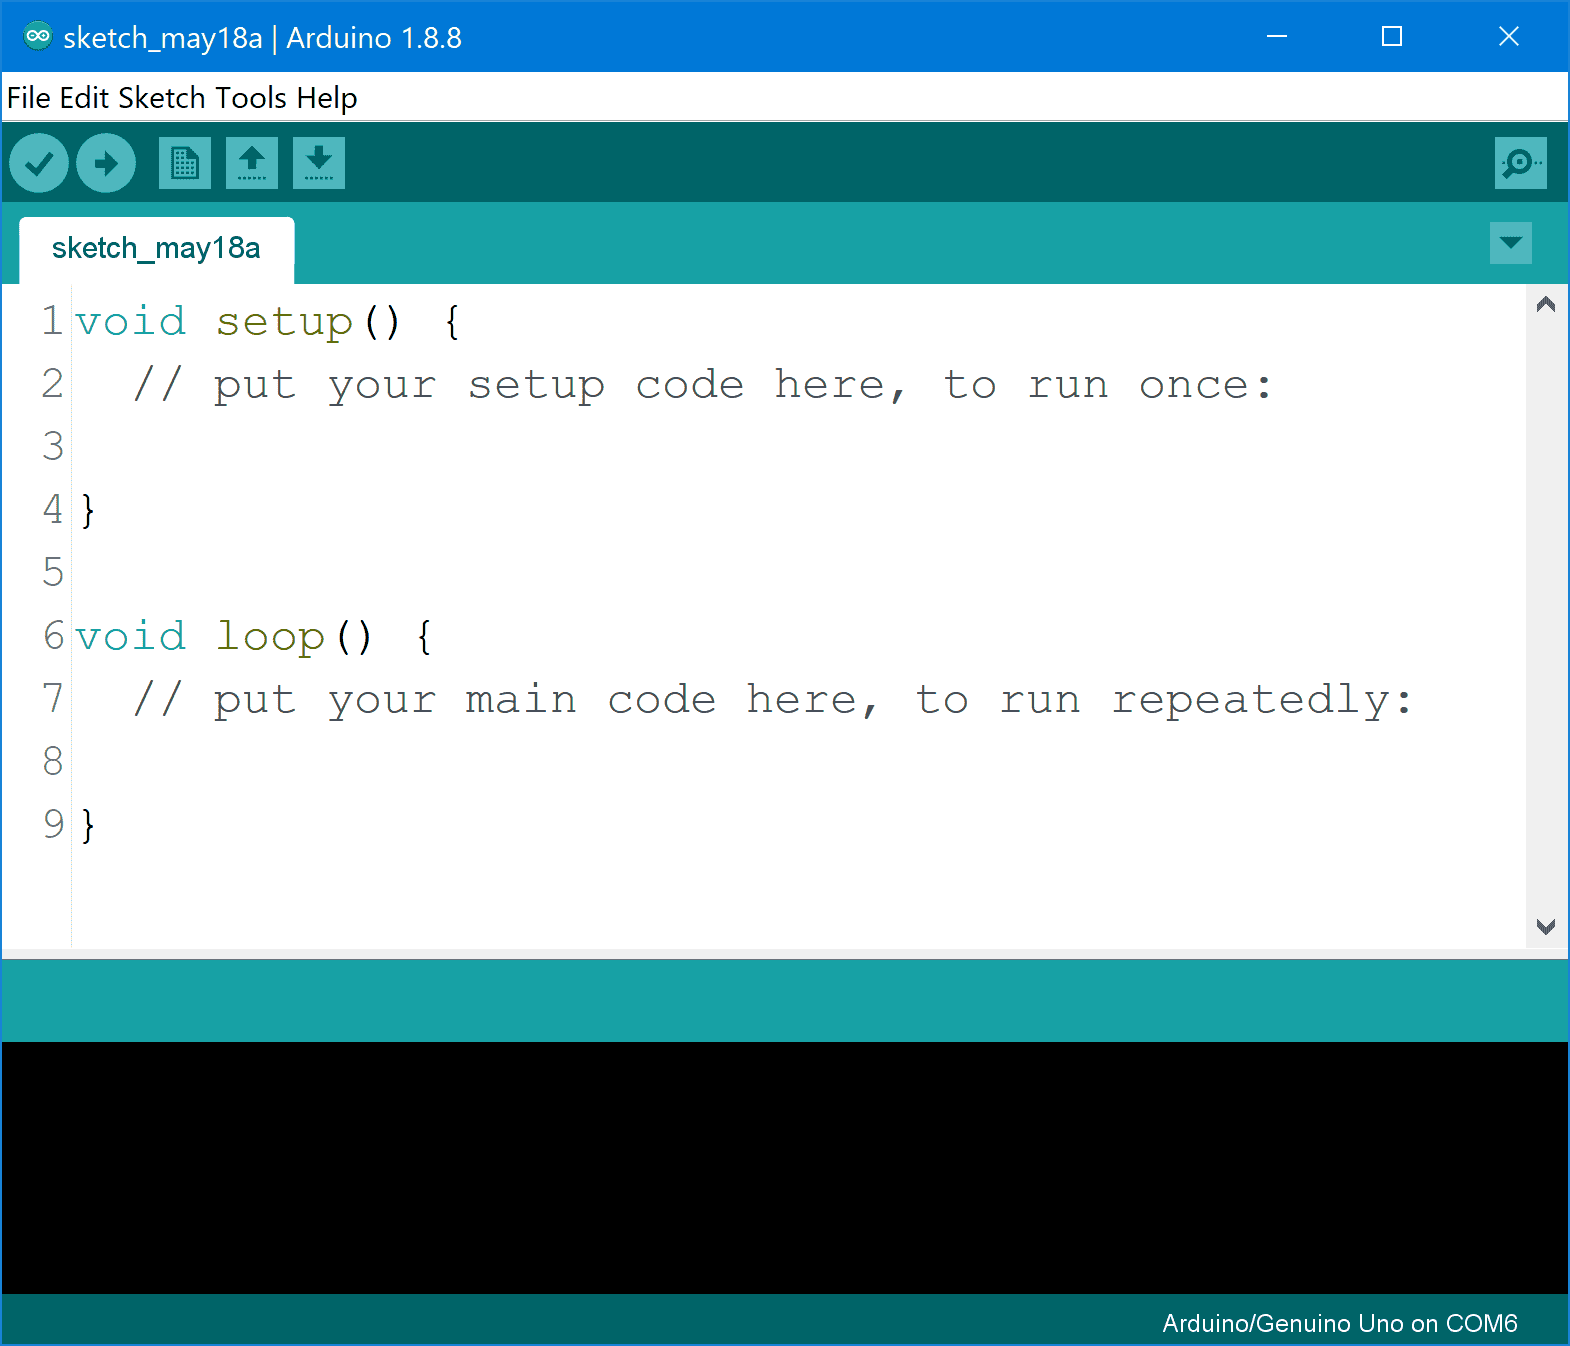
A setup() function and a loop() function are essential for the effective operation of every Arduino sketch.
When the program first launches, the setup() function is only ever called once. The code for initializing sensors, the serial monitor, and establishing pins as inputs and outputs are all included here because they don't change throughout the program.
The setup() function in the sketch is always put before the loop() function:

The loop() function is a further vital component of any sketch. The majority of the code will be placed in the loop() method, which is the sketch's primary section. An infinite loop is created by the loop() function, which repeatedly runs the code inside of it.
The setup() function and the loop() function have similar syntax. The two curly brackets should contain the code you want to run inside the loop:

When the Arduino executes this sketch, the setup() function's code is first executed once, followed by repeated executions of the loop() function until the power is turned off or a command to leave the loop is given.
HOW TO WRITE COMMENTS
Text fragments in a program known as comments are not executed. They help others comprehend your code and are a useful tool for keeping notes.
There are two methods for commenting. First, before the text you want to make a comment, type two forward slashes (/):
void loop(){
// this is a comment
}
When the program is run by the Arduino, any text following the / is ignored.
/* followed by a */ can be used to create multi-line comments, as in the following example:
/*
* this is a multi-line
* comment
*/
The IDE will identify any text between the two asterisks as a comment. A sketch's introduction typically includes multi-line remarks that describe how it operates and how to connect any external devices.
UPLOADING YOUR SKETCH TO THE ARDUINO: HOW TO
The next step is to upload the sketch to the Arduino when it has been written. Click the arrow in the window's upper left corner to upload a sketch.
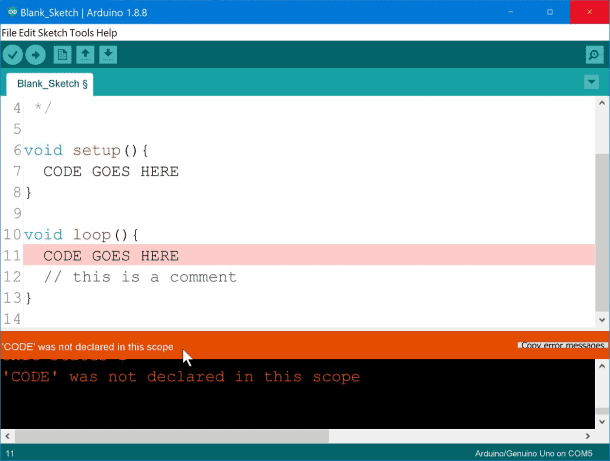
After that, the IDE will examine your code for typos and syntactic mistakes. If it discovers a mistake, it will notify you with an orange error message that looks like this:
The IDE will compile the sketch if the code is accurate and error-free. Compiling is the process of turning machine-readable code for the microcontroller from human-readable code, such as C and C++.
Following the compilation of the sketch, the IDE sends the code to the Arduino through the USB interface, where it is saved in the flash memory of the ATMEGA328. The sketch immediately begins to play and continues till the power is turned off.
The sketch is stored in the Arduino's flash memory, so even if the power is turned off, it will continue to function. The identical sketch will begin to run whenever the Arduino is turned on again.


0 Comments